
crystalmarksop
Table of Contents
Crystalmark Training SOP
Last edited: Rachel Lin (8/14/23)
Tool Lead: Yanis Yankauskas
Contact: ckwok520@ucsb.edu or flynnirvine@ucsb.edu
Training Checklist:
- Components Overview: CrystalMark DV-1, FlashCut CNC, camera, etching nozzle, part mount
- Safety: hot printheads & bed, moving components
- Job Setup
- At FlashCut CNC and CrystalMark: Open air pressure valve → turn on FlashCut CNC → turn on CrystalMark DV-1 → plug camera into computer → fixture piece onto part mount
- At the computer: export .dxf → Zeroing
- After cut: inspect and remove piece → vacuum area
- Part Removal Cleaning
- Vacuum
- Sharps
- Rates
Safety Concerns
- Inhaling large aluminum oxide abrasive is hazardous. Wear a mask and safety glasses during use.
- Silicon and glass pieces may have sharp edges. Handle with caution.
- Keep hands clear of etching during operation. Press any key on the keyboard in FlachCut CNC to stop operation.
Common Mistakes
- DV1 not applying abrasive
- Check to see if valve on air pressure tube is open (handle is parallel to tube)
- Check to see if DV1 is switched on
- FlashCut CNC 4 app is not connected
- Ensure FlashCut CNC is on and reconnect with FlashCut CNC 4 by going to the “Controller” tab and selecting “Connect…”
Safe Operating Procedures Review
- Open air pressure valve (to the left of FlashCut CNC)
- Turn on FlashCut CNC
- Turn on CrystalMark DV-1 (under table)
- Plug in camera to computer (USB connection)
- Fixture piece onto part mount
There are two ways to use the CNC: Etching with a .dxf file or manually etching: using .dxf file or manually
If .dxf:
- At computer: Load .dxf into the “DXF to G-Code Converter” application:

- For each shape in the display window, right click and select “Cutter Compensation” → select either “Right Compensation” or “Left Compensation” depending on whether you want the positive or negative compensation (the blue outline is the new cut path)
- Select “Export” → “Optimize and Export Shapes” → save as .ngc
- There may be an error message displayed: “Z infeed null” This may be ignored.
- open .ngc in “FlashCut CNC 4”:
- open “DinoCapture 2.0” (Used to monitor operation):
- Place the acrylic plate on the crystalmark mount
- Jog the nozzle into the hole
- “Set” → “Zero X and Zero Y”
- Jog the CNC down to the surface of your piece
- “Set” → “Zero Z”, be careful not to crash etching nozzle
- After zero-ing the Z axis, move up in Z until Z is at 1.1 mm. This will be your cutting height.
- Select “Jog” and jog CNC to where the .dxf origin should be on your piece
- “Set” → “Zero X”, “Set” → “Zero Y”
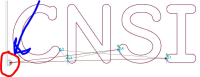
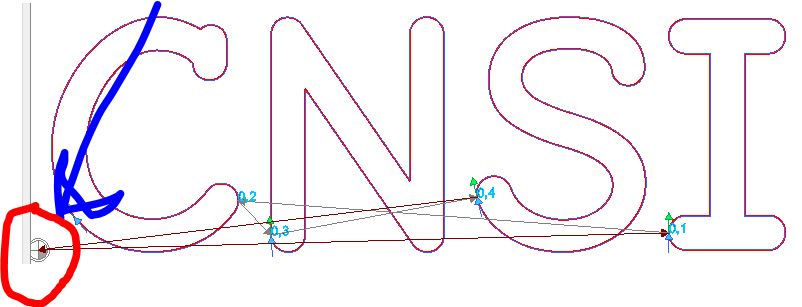
- Note that origin is displayed in “DXF to G-Code Converter” (You can modify the origin in the software your .dxf was created):
- Use tape and/or turn on vaccum to fixture part (optional)
- Begin etching : “G-Code” → “Start”
- Monitor operation
- Select any key while in “FlashCut CNC 4” to stop operation

If manual:
- open “FlashCut CNC 4”:
- open “DinoCapture 2.0” (Used to monitor operation):
crystalmarksop.txt · Last modified: 2024/07/15 16:35 by firvine