Table of Contents
EinScan-SP Training SOP
Last edited: Furst (8/28/20)
Overview:
This training provides an introduction to using the EinScan including:
- Setting up and calibrating the scanner
- Optimal conditions and techniques for scanning particulate parts
- Using the EinScan Turntable
- Fixing/reducing STL mesh files for export
Location:
the EinScan is located in fume hood #1 in the Innovations Workshop
Safety
Machine Limitations:
- The turntable has a maximum weight limit of 5kg (~11lbs). Exceeding this weight could damage the machine and its internal components.
Environmental:
- Keep the scanner in a well ventilated area. Keep flammables, corrosive agents, and liquids away from the scanner. Failing to do so will damage the machine and its internal components.
Physical:
- The projector emits a bright light. Avoid looking directly into the light source to prevent eye injury.
Training
Training requirements: Users must attend the in-person training session and should consult the Safe Operating Procedure and EinScan-SP Manual (both found on the Innovation Workshop GauchoSpace page).
Training Outline
- Overview of the scanner and the system setup
- Structured light projector and dual camera setup
- Electronically controlled turntable
- Laptop computer
- Safety
- Machine Limit
- Do not exceed 5 kg (11 lbs)
- Hazards
- Keep well ventilated, away from corrosives, liquids, and flammables.
- Walkthrough of starting up EinScan-S software
- File formats, different scan types
- EinScan-S menu
- Scanner Limitations (0.03 mm resolution)
- Bigger than 30x30x30 mm, smaller than 250x250x250 mm, less than 5 kg
- Do not scan reflective, transparent, or fuzzy objects
- Paint or coat dark objects with a light color
- Step by step walkthrough of a scan
- Scanning with the turntable
- Scanning without the turntable
- Adjusting the brightness and stitching scans
- Software walkthrough
- Turntable toolbar
- Scan editing toolbar
- Main toolbar (alignment, scans, exporting, brightness)
- Editing, Meshing, and exporting completed scans
Safe Operation of this Tool
Before Using the Scanner:
Make sure that the object:
- Is larger than 30x30x30mm (1.2×1.2×1.2in)
- Is smaller than 250x250x250mm (38x38x38in)
- Weighs less than 5kg (11lbs)
- Isn’t shiny, transparent, or furry
- Has all dark features lightened with a powder or coating
Sequence of Operation:
- Make sure the scanner is powered on and open the EinScan-S software (on desktop)
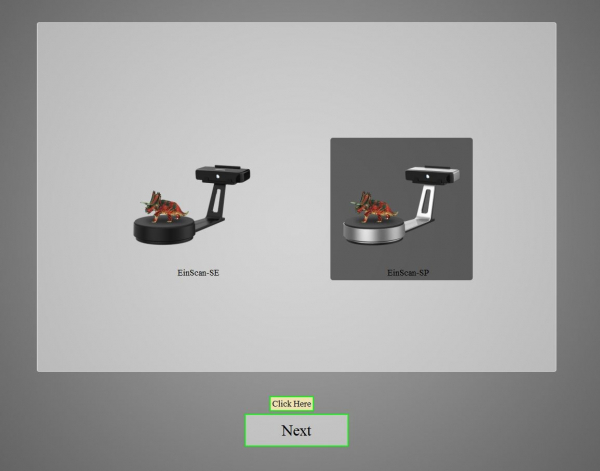
- Select EinScan-SP
- Under “Choose Working Mode”, select Fixed Scan
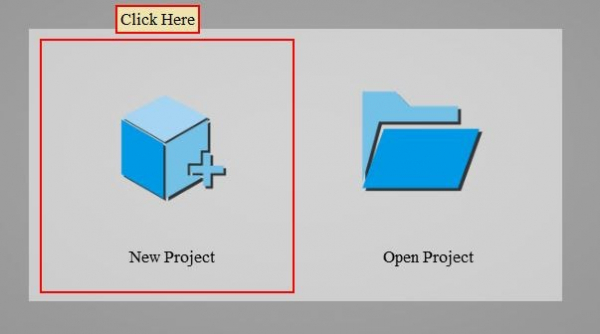
- Select New Scan or Open Scan. Name the file and save to your group’s folder to define the location for saved scan images (saved as .fix_prj file)
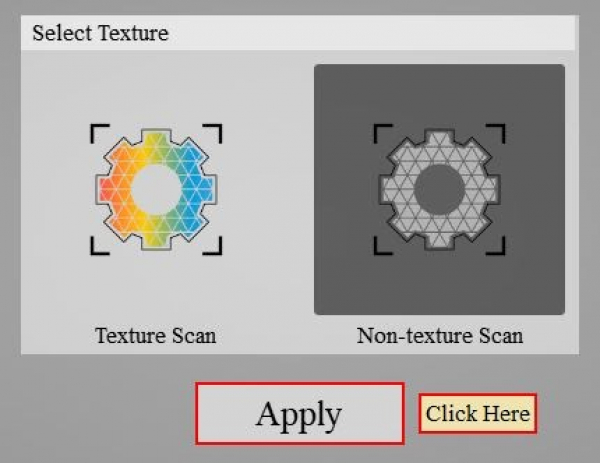
- Select Textured Scan or Non-Textured Scan
- Textured scan is used to scan colors and fine features. The user must run a white balance test when using this feature.
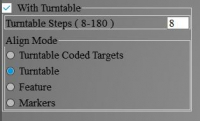
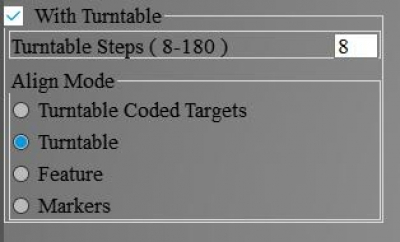
- Check the Use Turntable box and specify the number of increments (8-180 steps). The Align Mode menu will appear.
- Under Align Mode, select the desired alignment method
- Turntable
- Features
- Markers (External markers must be placed on the surface of scanned object)
Scanning Without the Turntable:
- Place the object in the desired orientation within frame of the two cameras
Starting and Editing Scans:
- Use Shift + Left Click and the toolbar to remove any unwanted scan data. Press the Green Check to confirm.
- Reorient the part and continue to scan until object is fully modeled (Same controls to modify the stitched model)
Exporting and Saving the Scan:
- Select Watertight to create a closed object file or an Unwatertight model to directly edit the object file
- After the object has been meshed, specify the desired Simplification Ratio. Make sure that Smooth and Sharpen are both selected. Specify Hole Fill Size if creating an Unwatertight model
Editing the Exported File: We do not currently have a universal software solution to edit and modify the generated part files. Please contact the lab staff if you have a solution to this problem. We will continue to research solutions. Meshmixer by Autodesk is so far the most promising mesh file editor, but is not available on lab computers for now.
Detailed Procedure-Step by Step
Supplies:
No supplies are necessary to use the EinScan-SP 3D scanner. A blackout enclosure is supplied to prevent light from affecting the scan quality.
Setup:
The default Innovation Workshop setup is to have both the scanning unit and the turntable attached to the scanner stand. Please contact the staff if you wish to try scanning from the tripod instead. The scanning unit and the turntable are both attached to the scanner stand.
The Scanning Unit:
Contains two cameras and a projector that is capable of projecting both structured and RGB light. The offset cameras provide two perspectives of the same point, allowing the software to calculate depth by comparing the two images. The cameras also capture the distortion of the structured light vertical lines projected over the object surface. This similarly measures the depth and features of the surface. The cameras also superimpose the images taken with Red, Green, and Blue light to create a color accurate 3D model of the object. This color image is combined with the structured light depth scans to create a colored 3D model. The scanning unit can also be removed from the stand and attached to the provided tripod to scan larger objects. The turntable is connected to the scanning unit via USB cable, and the scanning unit is connected to the laptop computer running EinScan-S software via USB cable. The power cable plugged into the scanning unit provides power for both the scanner and the turntable.
The Turntable:
Incrementally rotates 360 degrees per scan to capture a complete image of the object. The degrees rotated during each increment are adjustable in the EinScan-S software and range from 2 to 45 degrees. The turntable is controlled and powered via USB connection to the scanner. The surface of the turntable contains coded markers, which are used to reference the position of the object when the scanner is detached from the stand and placed on the provided tripod.
Operation: Prepare the object for scanning. Use the following checklist
- The part is larger than 30x30x30mm (1.2×1.2×1.2in) and smaller than 250x250x250mm (38x38x38in)
- The part weighs less than 5 kg (11 lbs)
- Make sure there are no transparent surfaces, reflective surfaces, or finely textured surfaces (like hair) on the object to be scanned.These surfaces affect the structured light and decrease the quality and resolution of the scan.
- Powder or coat any dark surfaces. This well help highlight the dark surfaces and increase the quality of the scan.
- Check that the scanner is powered on. The power button is located on the back of the scanner. A glowing blue border outlines the power button when the scanner is turned on
- Once the software has initialized, the scanner menu will pop up. Select EinScan-SP, and then click Next.
- The working mode menu will pop up. Select Fixed Scan and then click Next
- The projector will start emitting white light to shine on the part.
- Select New Project or Open Project and click to initiate.
To Start A New Scan:
- Name the project and designate a location. This will create a folder to store the scan images and the stitched project (saved as a .fix_prj) file. Individual images can be selected and deleted from this folder
To Open a Scan:
- Locate the project folder and open the .fix_prj file to open the scan project. The file will rebuild the scan using the images present in the folder.
- The texture menu will appear, and give the option of either Texture Scan or Non-texture Scan.
- A Texture Scan projects colored light in addition to structured light to create a color accurate scanned model of the object. Due to the additional images taken and data processing that must occur, the textured scan process is significantly longer. This mode is not recommended if you simply want to generate a 3D object.
- A Non-texture scan only uses structured light to capture the surface of the object to be scanned. No information about the color of the surface is captured, although colors on surface may show up separately due to the differing contrast (ie light colored text on a darker background will show up blotchy, even if the surface is flat). The non-textured scan process takes significantly less time than the textured scan process, and is recommended for scans where surface color is not important.
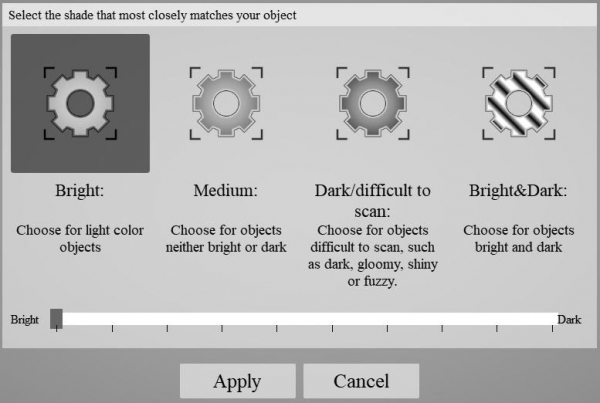
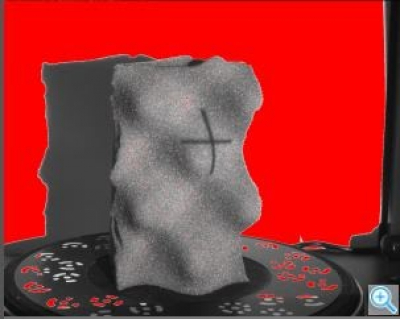
- Once a texture mode is selected, the brightness slider will appear. Use the camera screen in the upper right as a reference for adjusting the brightness level. Move the slider so that the crosshair is clearly illuminated on the object in the view window, but not so brightly illuminated that red areas show up on the object to be scanned. An example image of the right exposure over the part is shown.
- Scanning with turntable
- Make sure that the option With Turntable is checked. The following instructions are written under the assumption that the system is mounted on the scanning stand.
- Make sure that the option With Turntable is checked. The following instructions are written under the assumption that the system is mounted on the scanning stand.
- Tripod Scanning Methods
- Turntable Coded Targets, Feature, and Markers all require detaching the scanning unit from the scanner stand and mounting it on the provided Shining3D tripod. Details on these methods and using the tripod scanning setup are found HERE.
- Scanning without Turntable
- Make sure that the With Turntable box is unchecked. The Align Mode toolbar will minimize. This mode is used for conducting single image scans, instead of a complete rotation of the turntable. This mode is helpful for capturing specific features, or if only one surface of an object is desired to be scanned.
- Once the desired alignment mode is set and the brightness has been properly adjusted. It is time to start the scan (Note: The use of the turntable, the number of turntable steps, and the brightness can all be changed from scan to scan. This is a useful way to capture different features and create a more complete scan of the object.)
- The scan is started by clicking Start Scan
 . This icon is also used to restart a paused scan. The scan can be paused at any point by clicking Pause Scan
  . This will halt the scan, allowing you to continue or delete the current scan data. Clicking Delete Scan Data will abort the current scan and remove any captured data. If viewing the stitched object with multiple scans, selecting this icon will delete the most recent scan.
References
Manuals:
Other SOP's:
- Running Calibration (Coming Soon)
- White Balance Test (Coming Soon)
- Tripod Scanning Mode (Coming Soon)
MSDS sheets:
- MSDS sheet for powder/coating used
Sources for supplies:
- Vendor of powder/coating
Contact Information:
- Email:sales@shining3d.com
- Phone: +14152594787
Recipes:
- <Insert recipe for powdering if necessary>
Maintenance
- Run calibration every month
Calibration Step by Step:
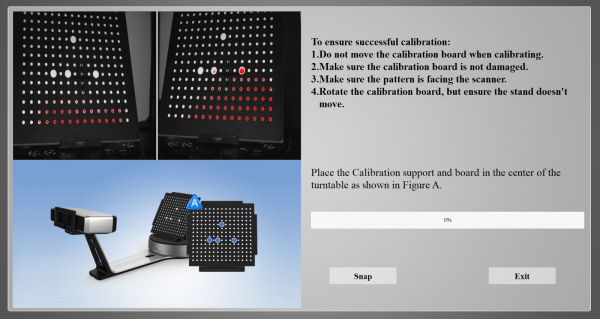
Note: Once the calibration stand has been placed, it is imperative that it does not move. Any shifts in the stand will affect the quality of the calibration and future scans.
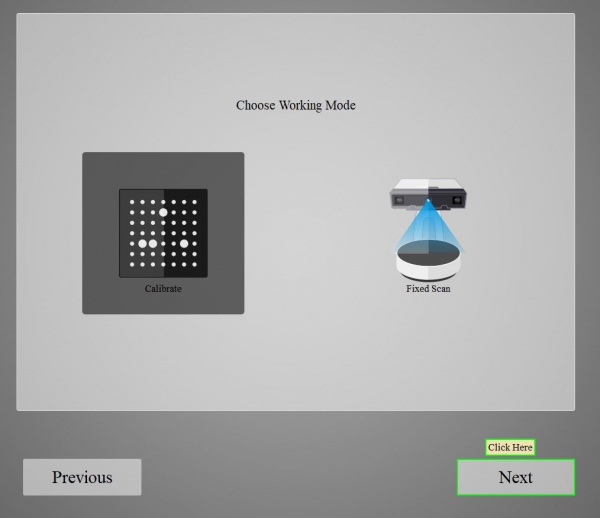
- Under “Choose Working Mode”, make sure that Calibrate is selected. Click Next.
- This menu will appear. Remove the calibration board from the black protective drawstring bag and snap together the calibration board stand. Place the stand in the center of the turntable facing the scanner, and mount the calibration board in Orientation A (specified by the software). When properly oriented, click Snap
 to proceed. The turntable will incrementally rotate and the progress bar will fill.
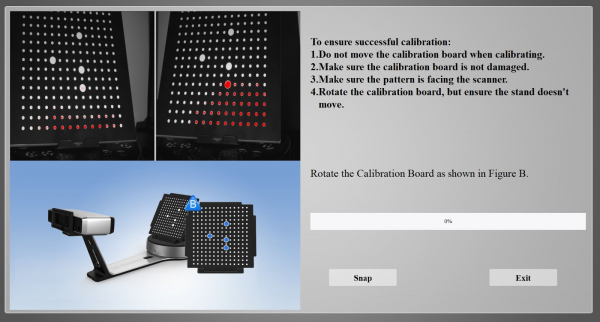
- The software will then prompt you to rotate the calibration board to match Orientation B. Carefully lift and rotate the calibration board without moving the stand.
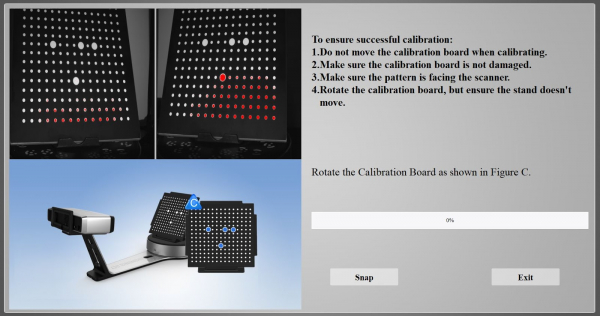
- The software will then prompt you to rotate the calibration board to match Orientation C. Carefully lift and rotate the calibration board without moving the stand.
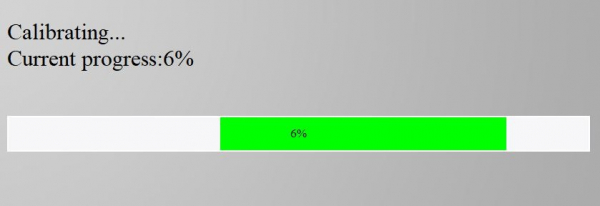 After completing the scan of Orientation C, the software will automatically start the calibration process. A progress bar will display as the software calibrates. It will automatically return to the “Choose Working Mode” menu when the calibration is complete.
Remove the calibration board from the stand and place in the protective drawstring bag. Remove the stand from the turntable and proceed with scanning.
Einscan Quick Review
Tool Lead:
Contact: andrewfurst@ucsb.edu
Safety Concern
- Lab coat and gloves must me used when handling resin
- Anything with uncured resin must be transported within a container to avoid spilling
Safe Operation Procedures Review
- Create a new project and designate file location
- Select desired texture mode (texture uses color data whereas non texture takes less time)
- Adjust brightness slider to properly expose image
- Select desired scanning mode (turntable or tripod are standard)
- Start Scan
- After scan completion using shift + left click to remove extraneous data
- Correct any misalignment using the align and shift + left click to select coincident points
Post Processing and exporting
- Select mesh to convert to mesh body
- Select watertight to create closed object or unwatertight to edit object file
- Select desired simplification ratio (to reduce processor stress) and file type (.STL, .OBJ, .PLY, .3MF, or .ASC)
Maintenance
- Calibration should take place once a week or before a scan for optimal accuracy
- Scanner and turntable should be wiped down frequently
- Computer should be restarted periodically and plugged in
